Tor Location Spoofing Guide
Mastering Location Spoofing with Tor: A Comprehensive Guide
Tor stands as a cornerstone technology for privacy-focused internet users. While its default settings provide excellent anonymity, customizing your connection to route through specific countries requires some additional configuration. This guide will walk you through the process across Windows, Mac, and Linux systems.
By making a few simple adjustments to your Tor configuration, you can direct your internet traffic through nodes in virtually any country - from Argentina to Zimbabwe - all from the comfort of your home.
Understanding Tor's Default Behavior
In its standard configuration, Tor routes your traffic through a series of random relays before reaching an exit node that connects to your destination website. This randomized routing creates a protective layer of anonymity by obscuring your original location.
Why Change Your Tor Exit Country?
There are legitimate reasons why users might need to appear as though they're browsing from a specific country:
- Political activists operating in restrictive regimes may need to mask their true location
- Journalists accessing region-specific information for investigative reporting
- Citizens bypassing unfair geographic restrictions on information
The Limitations of Country-Specific Routing
When configuring Tor to use specific countries, especially those with few nodes, you may encounter challenges:
- Connection failures due to limited available nodes
- Slower browsing speeds than standard Tor configuration
- Less reliable connections that may drop unexpectedly
Tor vs. VPNs for Location Spoofing
While this guide focuses on Tor, it's worth noting that VPNs offer an alternative approach to location spoofing. Consider your specific needs:
- Choose Tor for maximum anonymity without trusting third parties
- Consider VPNs for faster speeds when streaming or downloading
- Some premium VPNs offer Tor integration for enhanced privacy
Ethical Considerations
The Tor network relies on volunteer-operated nodes and has limited capacity. Using Tor solely for entertainment purposes like accessing geo-restricted streaming services places unnecessary strain on a network that serves critical human rights and privacy functions. For casual geo-spoofing, commercial VPNs represent a more responsible choice.
Getting Started with Tor Country Codes
Before modifying country settings, you'll need to:
- Download and install the Tor Browser
- Run Tor at least once to generate the necessary configuration files
- Locate the torrc configuration file on your system
Once you've completed these preliminary steps, you can begin customizing your country routing preferences through the torrc file, which allows you to specify exactly which countries your Tor traffic should pass through.
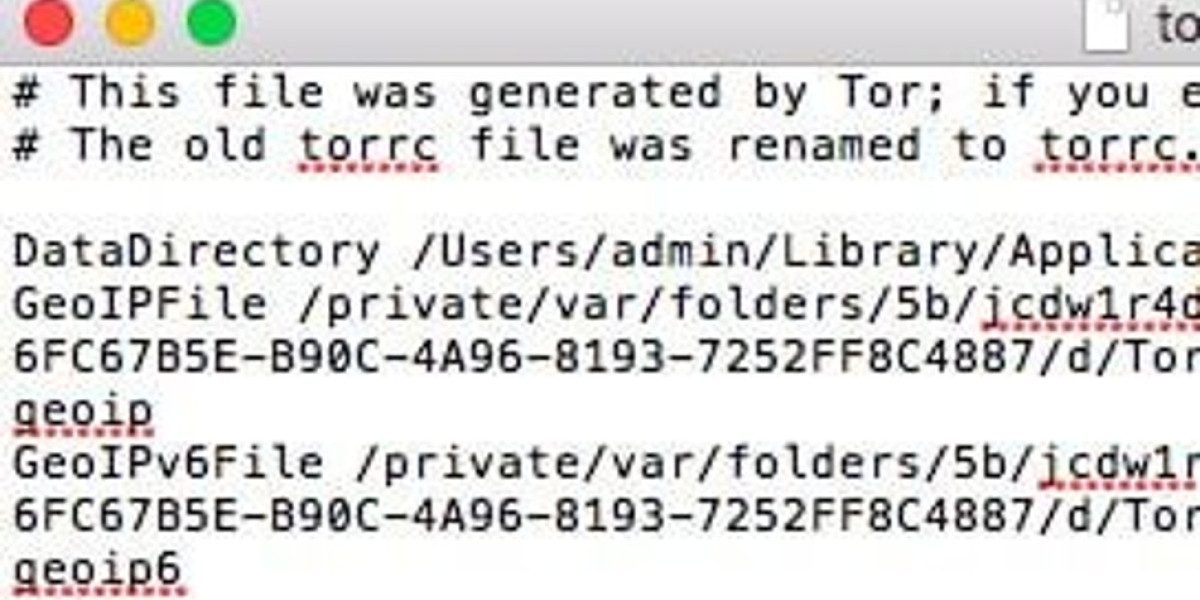
Double-click on the torrc configuration file to begin editing. When prompted to select an application, choose Notepad from the available options. This will open the file in a text editor window where you can view and modify the contents.
The Notepad interface will display the current torrc configuration settings, allowing you to make necessary changes to customize your Tor connection parameters.
Before diving into the process, ensure that you have launched Tor at least once to generate the necessary torrc file. If you haven't installed the Tor browser yet, start by downloading and installing it. After installation, open the browser and select 'Connect' to initiate the connection.
After successfully connecting with Tor, the next step is to locate the torrc file. Begin by navigating to the 'Go' tab in the Tor browser. From there, choose 'Go to' from the dropdown menu.
The Tor Browser is a powerful tool for maintaining privacy online, allowing users to mask their true location by routing their internet traffic through a network of relays. For advanced users seeking to appear as if they're browsing from a specific country, Tor offers country code configuration options across all major operating systems.
To begin customizing your apparent location, you'll first need to locate your Tor installation directory. This varies depending on your operating system.
For Windows users, navigate to your Tor Browser installation, typically found in your Program Files or directly on your C: drive. Mac users should check their Applications folder, while Linux users can usually find Tor in their home directory or usr/bin folder.
Once you've located the installation directory, look for the configuration files folder. This contains the settings you'll need to modify to implement country-specific routing.
Within this directory, you'll find the torrc file - the main configuration file that controls Tor's behavior. You can edit this with any text editor to add country code parameters.
To specify countries for your exit nodes, add lines using the format "ExitNodes {country code}" where the country code is the two-letter ISO code for your desired location. For example, {US} for United States or {DE} for Germany.
After saving your changes, restart the Tor Browser for the new routing preferences to take effect. Your connection will now appear to originate from your selected country, enhancing your privacy configuration with location-specific controls.
Access the Tor configuration directory on your system
Right-click the torrc file and choose Open With from the context menu
Scroll through the application list and select TextEdit as your editing tool
Modify the country code entries directly in the text interface
Save changes and restart Tor for the geolocation spoofing to take effect
To get started, you'll need to access a specific file. Opening this file is the first step in the process.
Begin by preparing your list of desired two-letter nation identifiers
Visit resources like SCCM Rookie to compile country codes in {XX} format
Ensure Tor Browser installation and initial connection established previously
Locate configuration directory through file explorer:
Tor Browser → Browser → TorBrowser → Data → Tor
Access torrc configuration file using plain text editing software
Insert EntryNodes and ExitNodes directives with selected codes
Example structure: EntryNodes {DE} StrictNodes 1
Save modifications and restart Tor client to activate geo-spoofing
Verify IP address changes through privacy checking tools
Multiple country entries can be separated by commas
Remember to disable custom nodes when not required
To modify your Tor settings and spoof your location, you need to use specific country codes. For instance, the Netherlands is represented by nl , Germany by de , the United States by us , Singapore by sg , and Australia by au . These will serve as both the entry and exit nodes in our example. If you need other country codes, refer to the comprehensive list provided in the linked resource.
After identifying the desired country codes, open the text editor you are using. This could be Notepad for Windows, TextEdit for Mac, or any preferred text editor in Linux. Locate the last line in your configuration file and add the following lines, ensuring there are spaces after "entrynodes" and "exitnodes", but no spaces between the country codes:
entrynodes {nl},{de},{us},{au},{sg}
exitnodes {nl},{de},{us},{au},{sg}
The entrynodes directive sets the countries where your connection enters the Tor network, while the exitnodes directive specifies the countries where it exits. Note that with these settings, Tor might still utilize nodes from other countries between the entry and exit points.
In case Tor cannot establish a connection using the specified entry and exit nodes, it will automatically use other available nodes, potentially routing your data through different locations.
For additional options, such as excluding specific nodes or forcing Tor to use only certain nodes, check the other useful Tor country codes section at the end of the tutorial. This can help you fine-tune your privacy and security settings.
Configuring Tor for Location Spoofing
Verify Tor installation before configuration
Navigate to browser settings > about:preferences
Locate torrc file in /Applications/TorBrowser/Data/Tor/
For terminal access: open -a TextEdit /Applications/TorBrowser/Data/Tor/torrc
Insert ExitNodes {country-code} at document bottom
Add StrictNodes 1 to enforce location rules
Save modifications securely with admin privileges
Restart Tor Browser for geo-spoofing activation
Alternative method via command line:
sudo nano /etc/tor/torrc
Append country restrictions using ISO2 codes
Ctrl+X > Y > Enter to confirm changes
Post-configuration verification essential:
Visit check.torproject.org for connection confirmation
Test IP location through multiple geolocation services
Rotate circuits manually if spoofing fails initially
Security considerations:
Avoid combining with VPNs unless properly chained
Disable browser geolocation APIs in privacy settings
Use HTTPS Everywhere extension to prevent SSL stripping
Regularly update Tor Browser to patch vulnerabilities
Advanced techniques:
Multiple country codes separated by commas
ExcludeNodes parameter for selective routing
Set entry/exit node preferences asymmetrically
Combine with bridge relays for censored regions
Troubleshooting tips:
Check for typos in country abbreviations
Verify torrc file permissions and ownership
Monitor bandwidth usage patterns for anomalies
Test with different circuit lengths if timing out
To change your location using Tor, you need to edit the torrc file with your preferred country codes. After selecting your desired country codes, follow these steps:
For Windows:
- Open Notepad and make the necessary changes.
- Click on File in the top left corner, then select Save As... .
- In the dialog box that appears, navigate to the Save as type dropdown at the bottom.
- Choose All Files from the list.
- Locate the
torrcfile, click on it, and then click Save .
- Confirm any prompts by clicking Yes .
To configure Tor for location spoofing, follow these steps based on your operating system.
For Mac users:
After editing the torrc configuration file, press Command+S to save your changes. Once saved, close the text editor application to complete this step.
For Linux users:
The save process varies depending on your preferred text editor. Common save commands include Ctrl+S for GUI editors like Gedit, or in terminal-based editors like Nano, press Ctrl+O followed by Enter, then Ctrl+X to exit.
Once you've modified and saved the torrc file with your desired country code, launch the Tor Browser to apply your changes. To verify your connection is routing through your specified location, navigate to any website - Wikipedia works well as a test site.
You can confirm your connection status by looking at the security indicator located to the left of the website address in the browser's URL bar. This appears as a circular icon containing an "i" symbol, which provides information about your current connection.
To alter your perceived location using Tor, you can modify the country codes for entry and exit nodes. Begin by checking the circuit to ensure it's going through your chosen countries. If set up correctly, you should see the traffic routed via your selected nodes, such as Germany and the Netherlands.
Modifying these settings is straightforward. Under the correct configuration, you can choose any nodes, and Tor will aim to route your traffic through them. If a stable connection cannot be established with the specified nodes, Tor will automatically switch to other available nodes.
However, this method may not be suitable for all scenarios. In some cases, it might be more effective to exclude specific nodes rather than specifying the ones you want to use. For instance, if you wish to avoid exit nodes in the United States, you can use the excludeexitnodes directive. To do this, open the torrc file in Notepad and enter:
```
excludeexitnodes {us}
```
If you need to exclude multiple exit nodes, separate them with commas. Similarly, to exclude certain nodes from being used as entry points, exit points, or anywhere in between, use the excludenodes directive:
```
excludenodes {us}
```
Using these directives alone can still result in Tor reverting to excluded nodes if no stable connection can be made. To prevent this, add the strictnodes setting. Set strictnodes 1 to ensure Tor only uses the specified nodes, even if it means failing to connect. Conversely, set strictnodes 0 to allow Tor to use other nodes if necessary.
For example, to absolutely avoid using any nodes based in the United States, you would enter:
```
excludenodes {us}
strictnodes 1
```
Tor’s flexibility in handling country codes allows you to tailor your connection to your specific needs and risk tolerance. Some users prioritize staying connected, while others are concerned about security when their traffic passes through certain locations. Fortunately, configuring Tor to meet your requirements is simple.
Currently, there are over 8,000 Tor relays globally. The top 100 relays, ranked by capacity, performance, and reliability, are predominantly located in the US, Canada, Germany, France, and the UK. These countries are part of the Fourteen Eyes intelligence-gathering alliance, which may be a concern for some users. Excluding these nodes can affect the quality of your connection, as only eight out of the top 250 relays by consensus weight are in non-SSEUR countries, such as the Czech Republic, Finland, Portugal, and Switzerland.
Additionally, Tor provides data on user connections. The majority of users connect from Russia (29.32%), Iran (24.74%), and the US (15.35%). Other significant countries include Germany (2.72%), Turkmenistan (2.49%), and China (2.41%).
What is a Netflix VPN and How to Get One
A Netflix VPN is a specialized virtual private network service that enables users to bypass geographical restrictions on streaming content by masking their actual location. By connecting to servers in different countries through a Netflix VPN, viewers can access shows and movies that might otherwise be unavailable in their region due to licensing agreements. This technology has become increasingly popular among streaming enthusiasts who want to explore Netflix's full global catalog rather than being limited to their local library.
Why Choose SafeShell as Your Netflix VPN?
If you're looking to access region-restricted content by Netflix VPN, you may want to consider the SafeShell VPN for its exceptional capabilities. This powerful VPN service offers high-speed servers specifically optimized for Netflix unblocked experiences, ensuring buffer-free playback and high-definition streaming of your favorite shows. SafeShell VPN also allows you to connect up to five devices simultaneously across multiple platforms including Windows, macOS, iOS, Android, and even Apple Vision Pro, making it incredibly versatile for all your streaming needs.
The SafeShell VPN stands out further with its exclusive App Mode feature that lets you access content from different regions simultaneously, expanding your entertainment options significantly. With lightning-fast speeds and no bandwidth limitations, you can say goodbye to buffering issues that plague other VPN services. Additionally, the proprietary "ShellGuard" protocol provides top-level security for your browsing sessions, ensuring your streaming activities remain private and protected. All these features can be tested through their flexible free trial plan, allowing you to experience the full Netflix unblocked capabilities before committing.
A Step-by-Step Guide to Watch Netflix with SafeShell VPN
To start using SafeShell Netflix VPN , the first step is to subscribe to their service. Visit the SafeShell VPN website and select a plan that suits your needs. Once you have chosen a plan, click on the "Subscribe Now" button to complete the subscription process. This will give you access to all the features and benefits of SafeShell VPN.
Next, you need to download and install the SafeShell VPN app on your device. Go to the SafeShell VPN website, select the appropriate version for your device (whether it's Windows, macOS, iOS, or Android), and download the app. After the download is complete, install the app on your device. Once installed, launch the app and log in with the credentials you created during the subscription process.
Once you are logged in, choose the APP mode to optimize your Netflix experience. Browse the list of available servers and select one located in the region whose Netflix content you want to access, such as the US, UK, or Canada. Click on "Connect" to establish a secure connection to the server. Finally, open the Netflix app or visit the Netflix website, log in with your Netflix account, and enjoy streaming the content available in the region you selected.